Fake Tan Removal: Quick Tricks for Perfectly Even Skin
Discover effective fake tan removal tips for smooth, glowing skin. Our expert advice offers quick and professional solutions to eliminate streaks and uneven color.
Skin tanners have always been a good accepted product for those who want to have nice bronze skin without risking there skin for sunburns or skin cancer form tanning beds or sunbathing. However, there can be cases when the effect is not just as it is supposed to be: stripes on the body, dots, or the feeling that the coloring is not even. The following article claims the following mission – to supply vital information about the way to remove fake tan and precisely why your skin is going to your back right into a natural state.
Understanding Fake Tan
What is Fake Tan?
These products also known as sunless or fake tan are cosmetic items that are used to give one the sun-kissed look. Hence such products and in general contain an active ingredient called dihydroxyacetone (DHA) which on reaction with the amino acids present in the dead layer of the skin leads to the formation of brown melanoidin color.
Types of Fake Tan
- Lotions and Creams: These are the most commonly used forms and are convenient to apply as they give gradual color improvement.
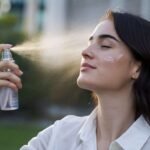
- Sprays: Include a rapid and more uniform application and used in professional tanning centers.
- Mousses: easy to apply and quickly dries on the skin to get an instant tan Light and absorb quickly into the skin to achieve an instant tan.
- Tanning Wipes: Portable and easy for quick application but they do not give an even tan.
Benefits of Using Fake Tan
- UV-Free Tanning: It also protects the individual from the harmful ultraviolet rays that may in turn cause skin cancer and cause early aging.
- Immediate Results: Get a suntan in a few hours without waiting on the sun.
- Customizable Color: Refine the application duration or frequency to control the depth of the tan.

Common Issues with Fake Tan
Streaks and Patches
Discolorations appear in the form of stripes or spots because of insufficient or improper product distribution onto the skin or wrong skin preconditioning.
Orange Tones
Ther are certain types of self-tanners which might turn to have an orange shade if it has been left for a long duration of time or due to the pH level of the skin.
Fading and Peeling
In general skins peel off exposing an uneven skin and this causes the tan to fade off.
Preparation for Removing Fake Tan
Skin Assessment
- Evaluate Your Skin Type: Some knowledge of one’s skin type can be useful in determining a preferred removal method.
- Check for Sensitivities: There should be a conscious concern about one’s skin sensitivity in order to prevent irritation during the process of removal.
Gather Necessary Supplies
- Exfoliants: Comb, gloves, and the like – exfoliating scrubs.
- Moisturizers: Cleansing or moisturizing body milks or oils.
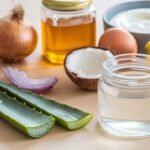
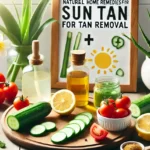
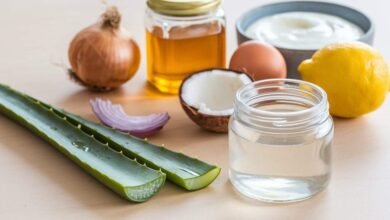
- Natural Remedies: Lemons, baking soda, coconut oil… even onion juice.
Setting a Timeline
Know ahead when you want to remove your tan and schedule enough time for the process, especially when you plan to attend an event or touch up again.
Methods to Remove Fake Tan
Exfoliation Techniques
Physical Exfoliation
the mechanical exfoliation – the using of tools like loofahs, brushes, and sometimes even exfoliating gloves for the purpose of scrubbing of the upper layer of the skin.
Chemical Exfoliation
Chemical exfoliators are those whose active ingredients are ingredients that chemically interact with the dead skin cells such as alpha-hydroxy acids (AHAs) or beta-hydroxy acids (BHAs).
Bathing Methods
Soaking Baths
Lubricate the skin with warm baths using ingredients such as baking soda or bath oils to create a tanning effect.
Steam Showers
Following this steaming is done to open the pores and make the tan easier to remove.
Natural Remedies
Lemon Juice and Baking Soda

And combining these natural ingredients to form a paste that will assist in lightening the tan.
Coconut Oil and Sugar Scrub
A scrub that helps to fade and smooth the skin while removing tan.
Store-Bought Products
Tan Remover Products
Specialized scrubs to stimulate and help eliminate DHA and tan well.
Exfoliating Scrubs and Creams
They offer commercial exfoliants that aid in skin sloughing and de-tan.
Detailed Steps for Removing Fake Tan
Step-by-Step Exfoliation Process
- Preparation: Apply warm water on the skin before you scrub it.
- Application: Start with an exfoliating scrub or exfoliating tool.
- Scrubbing: You should clean in a circular motion using a light touch and pay more attention to the areas that must have the most tan build-up.
- Rinsing: They should then wash off the exfoliant.
- Moisturizing: Hydrate by using lotion to maintain the skin from becoming dry.
Using Tan Remover Products
- Choose a Product: Choose a tan remover that is effective for your skin tone.
- Application: Cover the product with the remover and follow the instructions indicated on it: leave the remover on for the required amount of time.
- Rinsing and Exfoliating: Wash it off and proceed to exfoliate if needed.
- Moisturizing: Following the application, it is essential to hydrate the skin.
Home Remedies Application
- Preparation: Use natural ingredience to such as lemon juice and baking soda or coconut oil and sugar.
- Application: patient should apply the mixture on the skin and leave it for few minutes.
- Scrubbing: Apply the mixture on facial skin and gently rub for few seconds.
- Rinsing: They should then wash off the exfoliant.
- Moisturizing: Hydrate by using lotion to maintain the skin from becoming dry.
Post-Removal Care
Hydration
This is very important as using moisturizers frequently keeps the skin hydrated.
Skin Protection
Do not expose your skin to the sun for a long time as it may be irritated after exfoliation.
Regular Maintenance
Use exfoliation methods once or twice a week to keep the skin smooth and ensure it is ready for tanning applications.
Preventing Fake Tan Issues
Proper Application Techniques
Pre-Tanning Preparation
- Exfoliate: It works best if you exfoliate the dead skin cells before applying the tan.
- Moisturize: Moisturize with a light cream anywhere on the body that feels particularly dry, especially knees and elbows.
Application Tips
- Use a Tanning Mitt: Press firmly to make sure it is evenly spread and doesn’t leave stained hands.
- Apply Evenly: Rotate the cotton pad gently in circular motions to prevent ruining the makeup.
Post-Application Care
Immediate Care
- Avoid Water: Let it dry for a few hours after applying in order to develop tan.
- Wear Loose Clothing: Avoid smearing and unbalanced tan.
Long-Term Maintenance
- Moisturize Daily: Moisturize your skin to maintain and possibly prolong your tan.
- Avoid Harsh Products: Take care of the skin by using mild soaps and products that can actually fade the tan.
Conclusion
Removing fake tan can be a straightforward process if approached correctly. By understanding your skin type, using the right products, and following a detailed removal process, you can effectively and safely return your skin to its natural state. Remember to take care of your skin post-removal and prepare properly for future tanning applications to avoid common issues.Also follow us on Medium and Pinterest.
FaQs About Fake Tan Removal:
How Often Should I Exfoliate to Remove Fake Tan?
Exfoliate every few days or as needed until the tan is removed, being careful not to irritate the skin.
Can Fake Tan Be Removed in One Session?
It may require anywhere between 2 to 6 sessions to remove all traces of the tan depending on how deep it is and your skin type.
Are There Any Risks to Removing Fake Tan?
Yet it has to be done carefully as applying too much may lead to skin irritations or dryness. Alwayos follow up with a moisturizer and never harsh scrubbings.
Can I Reapply Fake Tan Immediately After Removing It?
It’s best to wait a day or two after removal to allow your skin to recover and ensure a smooth application.
What If I Have Sensitive Skin?
Use gentle, natural exfoliants and moisturizers. Test any product on a small skin area before full application.
- Top 10 Moisturizers for Every Skin Type

- Top 6 Benefits of Primose Oil For Skin.
- My Dental Healthy Journey
- Understanding Hair Porosity: Tests, Tips, and Care Routines
- Top 10 Amazing Benefits of Rose Water for Skin
- Aloe Vera Hair Masks for Healthy and Beautiful Hair
- Natural Ways to Remove Sun Tan Fast
- How to Get Thick Hair: Simple Habits for Thicker, Longer Hair
- Is Jojoba Oil Good for Low Porosity Hair?
- Top 7 Skin Benefits of Batana Oil
- DIY Face Masks for Glowing Skin: Natural Remedies
- Natural Remedies for Clear Skin: Glow Naturally
- Rosehip Oil for Acne Scars: Does It Really Work?
- Almond Oil for Hair: Tips for Thicker Locks
- Top 10 Natural Remedies to Stop Hair Fall